Formulators' Lab to Plant Playbook for Pigment Dispersion plus DLS
Formulators' Lab to Plant Playbook for Pigment Dispersion plus DLS ! Pigment dispersion laboratory title card illustration Most pigment dispersion issues trace back to one of four culprits: poor wetting, a dispersant mismatch or dosage error, letdown solvent stripping the dispersant off the pigment…
Most pigment dispersion issues trace back to one of four culprits: poor wetting, a dispersant mismatch or dosage error, letdown solvent stripping the dispersant off the pigment surface, or insufficient milling. The fastest triage is a rub-out test combined with a small dispersant dosage ladder, checked against dynamic light scattering (DLS) and turbidity readings. Confirm which failure mode you're dealing with before changing equipment or chemistry, and the fixes below follow in sequence.
TL;DR:
- Proper wetting agents and dispersant dosage are crucial, as overdosing can cause flocculation through depletion, not just underbilling.
- Confirming failure modes requires simple tests like rub-out, turbidity monitoring, particle size analysis, and centrifuge separation, before adjusting equipment or chemistry.
- Most dispersion problems stem from incorrect dispersant application or incompatible solvent packages, which are inexpensive to verify and prevent costly failures later.
- High-speed pre-mix significantly improves bead-mill efficiency and reduces over-milling risk, with bead size tailored to pigment type and desired gloss level.
- Dispersant selection should target pigment surface chemistry, and dosage levels must be optimized through ladder testing based on pigment weight, not volume.
Every defect points to a narrower set of causes, which means the diagnostic path should start with what you actually see in the can or on the panel, not with a generic refill.
Match the symptom, then run the single fastest confirming test before touching your process:
- Floating or flooding (color separation on drawdown): usually a wetting or surfactant imbalance between pigments. Confirm with a rub-out test comparing rubbed versus unrubbed film color.
- Poor rub-out recovery: points to residual agglomerates from inadequate milling. Confirm with DLS particle-size distribution.
- Hard settling (cake that resists stirring): often flocculation driven by dispersant depletion or electrolyte contamination. Confirm with a visual centrifuge separation test.
- Color shift on storage: typically flocculation or partial re-agglomeration. Confirm with turbidity monitoring over 48 to 72 hours.
- Gloss loss: frequently large residual particles above the coating's critical pigment volume threshold. Confirm with particle-size distribution against your gloss specification.
- Abnormally high viscosity: signals overdosed dispersant causing depletion flocculation, or underbilled pigment increasing surface area demand. Confirm with a rheology sweep across shear rates.
A quick pH and ionic-strength spot check belongs in every one of these paths, since electrolyte contamination from tap water, recycled solvent, or an incompatible additive can trigger flocculation that mimics almost every symptom above.
Why Dispersions Fail: Wetting, Milling, and Stabilization Breakdown
Dispersion happens in three overlapping stages: wetting, deagglomeration, and stabilization. A failure at any one stage produces the defects cataloged above, according to the foundational framework from UL Prospector's dispersion basics.
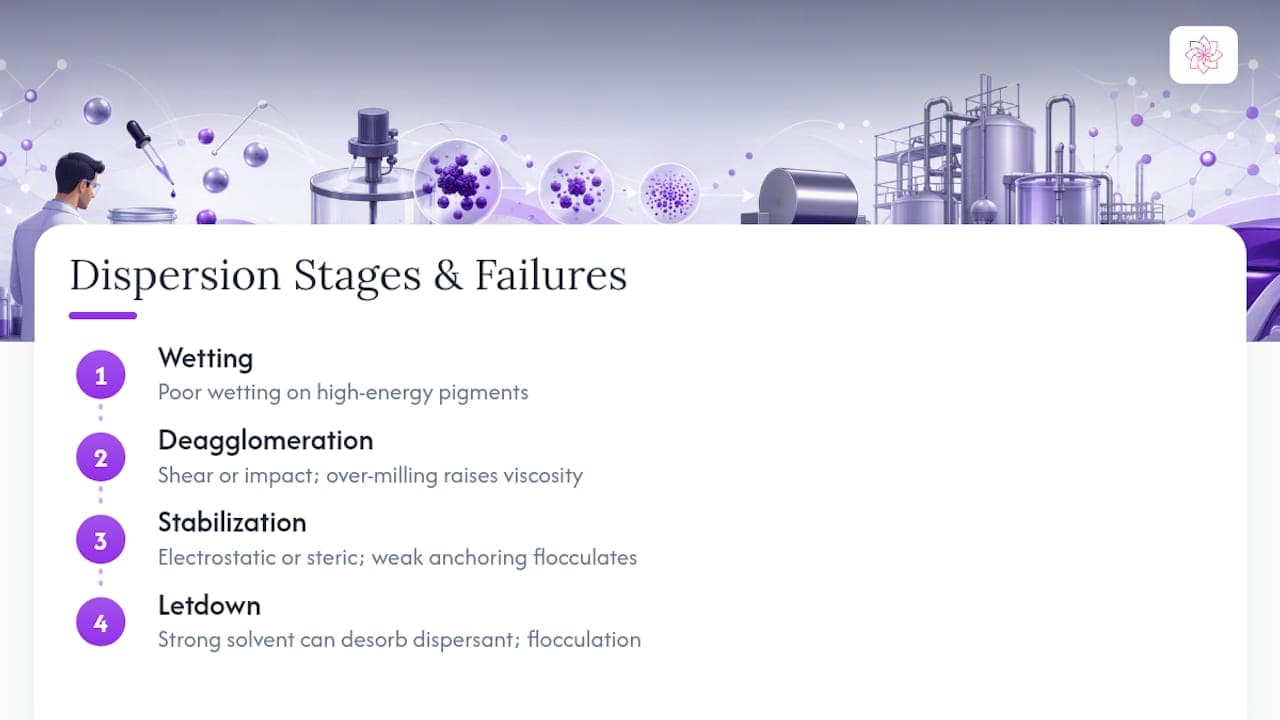
Wetting happens when the vehicle's surface tension is low enough to displace air from the pigment surface and penetrate agglomerate pores. High-surface-energy pigments, particularly untreated organics and some carbon blacks, resist this. Wetting agents lower interfacial tension to speed penetration, but overdosing one risks foam stabilization and adhesion loss at the substrate. Our wetting versus dispersing guide breaks down when a wetting agent is actually the missing piece versus when the real problem is downstream.
Deagglomeration separates loosely bound agglomerates (shear-breakable) from tightly fused aggregates (which usually require impact milling to reduce). Bead mills apply shear and impact together; high-speed dispersers rely mostly on shear. Push residence time too far and you get over-milling: viscosity rebounds and, in some pigment systems, surface damage that hurts color development rather than helping it, a pattern documented in Ranbar's troubleshooting guide.
Stabilization keeps deagglomerated particles apart once milling stops. Electrostatic stabilization relies on charge repulsion and dominates in waterborne, inorganic-heavy systems. Steric stabilization uses adsorbed polymer chains to create a physical barrier, and it's the default for solventborne and organic-pigment systems, per PCI Magazine's additive overview. Either mechanism fails if the dispersant's anchoring group doesn't bind the pigment surface strongly enough, or if its tail is incompatible with the letdown resin.
Pro Tip: Excess dispersant is not a safety margin. Free, unadsorbed polymer chains left in solution can trigger depletion flocculation through entanglement, raising viscosity in a way that looks like underbilling but is actually the opposite problem.
Letdown is where a well-built mill base most often gets destroyed. A solvent package that's too strong a solvent for the dispersing resin can desorb the dispersant from the pigment surface mid-letdown, according to the American Coatings Association, producing sudden flocculation that no amount of remilling the original paste will fix.
How to Test Pigment Dispersion Quality: A Lab-to-Plant Sequence
Run these tests in order. Each one either confirms or rules out a mechanism before you spend time on the next.
- Rub-out test. Draw the paste down unrubbed and rubbed side by side. A color or gloss difference confirms flocculation or incomplete wetting immediately, before any instrument touches the sample.
- Turbidity over storage. Track turbidity at fixed intervals for 48 to 72 hours. A steady baseline signals stability; a rise followed by a drop indicates flocculation followed by settling.
- DLS particle-size distribution. A tight, unimodal peak confirms good deagglomeration. A bimodal distribution means residual agglomerates survived milling.
- Rheology sweep. Measure viscosity across a shear-rate range and check for hysteresis between the up-curve and down-curve. Excess hysteresis often points to weak or reversible flocculation.
- Centrifuge or settling test. Spin a sample to accelerate settling and check for a hard, unstirrable cake versus a soft, redispersible sediment.
Run the dosage ladder test in parallel: hold milling and base formulation fixed, vary dispersant level in steps, and plot viscosity, color strength, and turbidity against dosage. The study on polymeric dispersant concentration found the viscosity minimum and best stability cluster around an intermediate concentration, not the extremes. Keep sample prep identical across the ladder (same shear history, same rest time before testing), or the data won't be comparable.
Milling and Letdown Fixes That Actually Improve Dispersion
Process changes fix a large share of persistent pigment dispersion issues without touching the formulation at all. Start with pre-dispersion quality: a high-speed disperser pre-mix should eliminate visible fish-eyes before the batch ever reaches a bead mill.
- A strong pre-mix improves bead-mill efficiency by more than 30%, per Ranbar's process data, which cuts both energy use and the risk of over-milling.
- Bead size should scale to your fineness target: smaller beads (sub-1mm) suit fine organic pigments and high-gloss targets, while larger beads handle coarser inorganics faster with less risk of surface damage.
- One to two bead-mill passes satisfy most architectural and industrial systems; additional passes rarely add fineness and often just raise heat and viscosity.
- Match letdown solvent and resin polarity to the dispersant's tail chemistry before scaling up, and confirm with a small-scale solubility-parameter check.
- Add letdown material slowly and match temperature and viscosity between the paste and the letdown vehicle, since rapid addition into a mismatched vehicle is a frequent, underrated cause of flocculation at scale.
- Deploy anti-settling or rheology-modifying agents when storage stability, not initial dispersion, is the persistent failure point.
Powder and liquid systems handle these mismatches differently, and reviewing how powder coating and liquid paint finishes compare is useful context when a formulation is being evaluated across both platforms.
Choosing and Dosing the Right Dispersant
Chemistry selection follows the same polarity logic as stabilization mechanism. Electrostatic dispersants suit aqueous systems dispersing inorganic pigments and extenders; steric dispersants suit solventborne systems and most organic pigments, a distinction PCI Magazine treats as the starting decision point for any new formulation.
- Match the anchoring group to pigment surface chemistry. Acidic anchoring groups bond well to basic pigment surfaces (many inorganics); amine or aromatic anchoring groups suit acidic or aromatic organic pigment surfaces.
- Run the dosage ladder against pigment weight, not batch volume. Test points near 50% dispersant-to-pigment ratio often mark the performance optimum; deterioration in viscosity and color strength typically shows up above an upper intermediate dispersant level, based on ratio testing published in dispersant stability research.
- Track HLB and surfactant synergy. A wetting agent with an HLB mismatched to the dispersant can compete for the pigment surface instead of supporting adsorption.
- Confirm the minimum-viscosity, maximum-color-strength point, then add a 5 to 10% safety margin rather than rounding up arbitrarily.
- Before scaling to plant batches, rerun the rub-out and turbidity checks on the chosen dosage using plant-representative mixing equipment.
Pro Tip: If viscosity climbs again above your ladder's minimum point, don't assume undermilling. Check for depletion flocculation from excess free dispersant first, since remilling an overdosed batch usually makes viscosity worse, not better.
Our dispersant selection and dosage guide and surface-area dosage calculation method both walk through this ladder in more detail for specific pigment classes.
What Astra R&D Sees Most Often in Customer Formulations
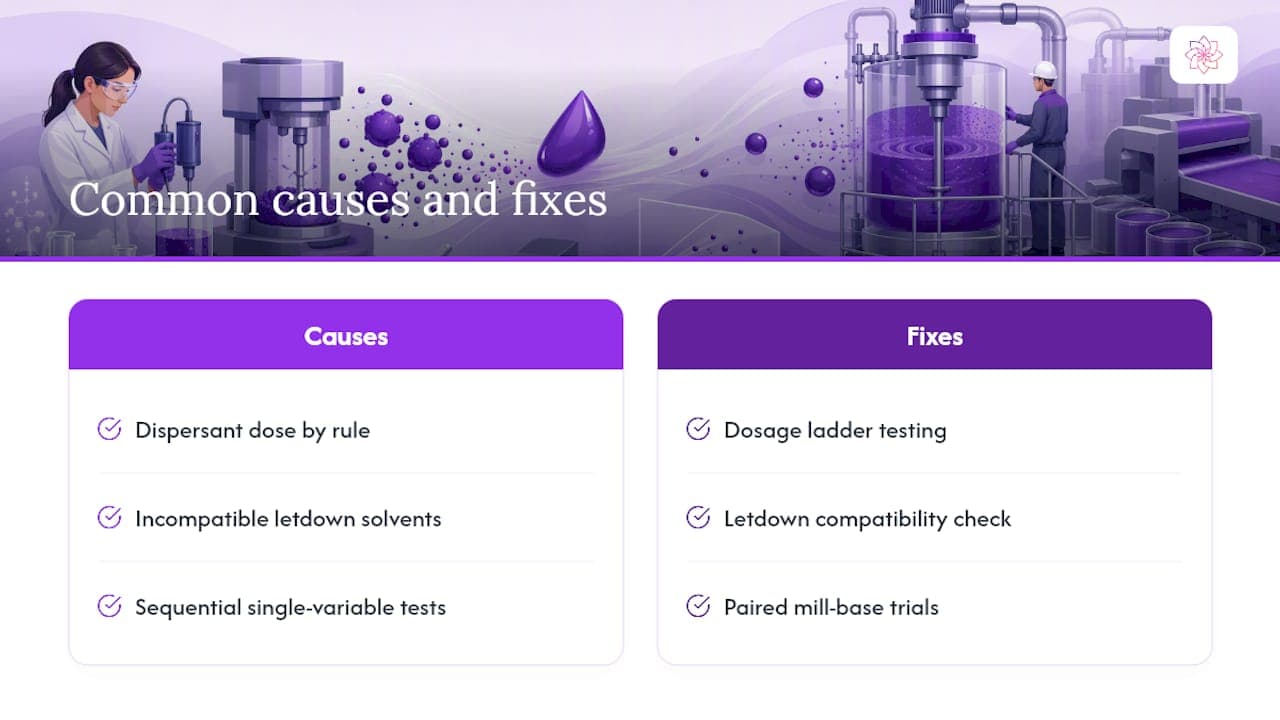
Across customer troubleshooting projects, the same two root causes recur far more than exotic chemistry failures: dispersant dosage set by rule of thumb rather than a ladder test, and letdown solvent packages chosen for cost or availability without a compatibility check against the dispersant's tail chemistry. Both are cheap to test and expensive to ignore.
Collaborative sample testing, running a dosage ladder alongside a letdown compatibility check on the customer's actual resin and solvent package, consistently cuts the time to a stable formulation compared to sequential, single-variable troubleshooting. and would sharpen these conclusions further, and that kind of paired testing is exactly what a mill-base trial is built to surface before a plant batch is at risk.
— Astra R&D Team
Astra DISP® Dispersants for Persistent Dispersion Problems
Reliable dispersants are the alternative to guessing your way through a dosage ladder with generic additives. Astra DISP® dispersants are built around anchoring chemistry matched to specific pigment classes, giving formulators both electrostatic and steric stabilization options engineered for resistance to letdown stripping, one of the most common points of failure covered above.

Where wetting agents introduce foaming risk during high-speed pre-mix, Astra-chemical's silicone and non-silicone defoamer lines address that side effect without undoing the wetting benefit. The full additive portfolio covers dispersants, defoamers, and rheology modifiers as a coordinated system rather than isolated fixes.
If your current formulation is stuck on a dosage plateau or failing at letdown, request a technical consultation or a mill-base trial through the Astra DISP® product page. Bring your current dosage ladder data, or start one with Astra-chemical's technical team from scratch.
Sources
- Pigment Dispersion I, The Basics — American Coatings Association
- Scientific study on polymeric dispersant concentration and dispersion stability
- UPDATE: The Basics of Dispersion and Stabilization of Pigments and Fillers
- Pigment dispersion in coatings: dispersant selection, milling and troubleshooting - Ranbar Pigment
- Wetting and dispersing additives — PCI Magazine
FAQ
What causes most pigment dispersion issues?
Poor wetting, an incorrect dispersant dosage, letdown solvent stripping the dispersant off the pigment, and inadequate milling account for the large majority of dispersion failures seen in coatings and inks.
Why does my formulation flocculate only after letdown?
The letdown solvent is likely too strong a solvent for the dispersing resin, which desorbs the dispersant from the pigment surface and triggers flocculation that milling changes alone won't fix.
How many bead-mill passes does a typical formulation need?
Most architectural and industrial systems reach target fineness in one to two bead-mill passes after a proper high-speed pre-mix; additional passes usually raise viscosity without improving color strength.
Does temperature affect pigment dispersion stability?
Yes. Temperature mismatches between the paste and the letdown vehicle change viscosity ratios during mixing, which can destabilize an otherwise well-built dispersion during scale-up.
Recommended
Testing additives for this application?
Send us your current formulation challenge and our technical team will recommend an ASTRA product package for lab screening.