Achieving Stable Pigment Dispersion in Coatings and Inks
Achieving Stable Pigment Dispersion in Coatings and Inks ! Decorative title card illustration Achieving a stable pigment dispersion requires three sequential steps: wetting, deagglomeration, and stabilization.
Achieving a stable pigment dispersion requires three sequential steps: wetting, deagglomeration, and stabilization. Skip or rush any one of them, and the batch fails downstream, whether that shows up as poor gloss, flocculation in the can, or color drift after letdown.
The immediate lab actions: select a dispersant class matched to your pigment and binder chemistry, run a ladder study to find the correct dosage, and confirm the result with a Hegman gauge reading and a rub-out test. Choose pre-dispersion equipment (typically a dissolver) before moving to fine milling.
- Map pigment chemistry and solvent polarity to a dispersant class before screening
- Run a dosage ladder study around an estimated midpoint
- Check fineness of grind and rub-out before committing to full-scale production
- Consider ASTRA DISP® dispersants and Astra's dosage guides for system-specific starting points
Key Takeaways
A stable pigment dispersion depends on sequencing wetting, deagglomeration, and stabilization correctly, then confirming dosage with a ladder study rather than a datasheet default.
| Point | Details |
|---|---|
| Follow the three-step sequence | Wet the pigment fully, deagglomerate with matched shear or impact energy, then stabilize with a compatible dispersant. |
| Run a ladder study per pigment lot | Test five to seven dose rungs around an estimated midpoint to find the true optimum, not just the datasheet suggestion. |
| Confirm with Hegman and rub-out tests | Use fineness of grind and rub-out results as pass/fail criteria before committing to full-scale production. |
| Match equipment settings to the lab | Target constant power input and consistent peripheral velocity to reproduce lab results at plant scale. |
| Request ASTRA DISP® samples for screening | Compare two or three dispersant grades against your specific pigment before locking in a formulation. |
Every pigment particle arrives from the manufacturer coated in adsorbed air and moisture at its surface. Wetting displaces that air with liquid vehicle, and it only happens when the liquid's surface tension is lower than the pigment's surface energy. High-energy pigments like carbon black or certain organic reds resist wetting badly, which is why wetting agents or surfactant-modified dispersants matter so much at this stage. A quick lab check: drop the pigment powder onto the vehicle surface. If it sits and beads rather than sinking within seconds, your wetting package needs attention before you even touch the mill.
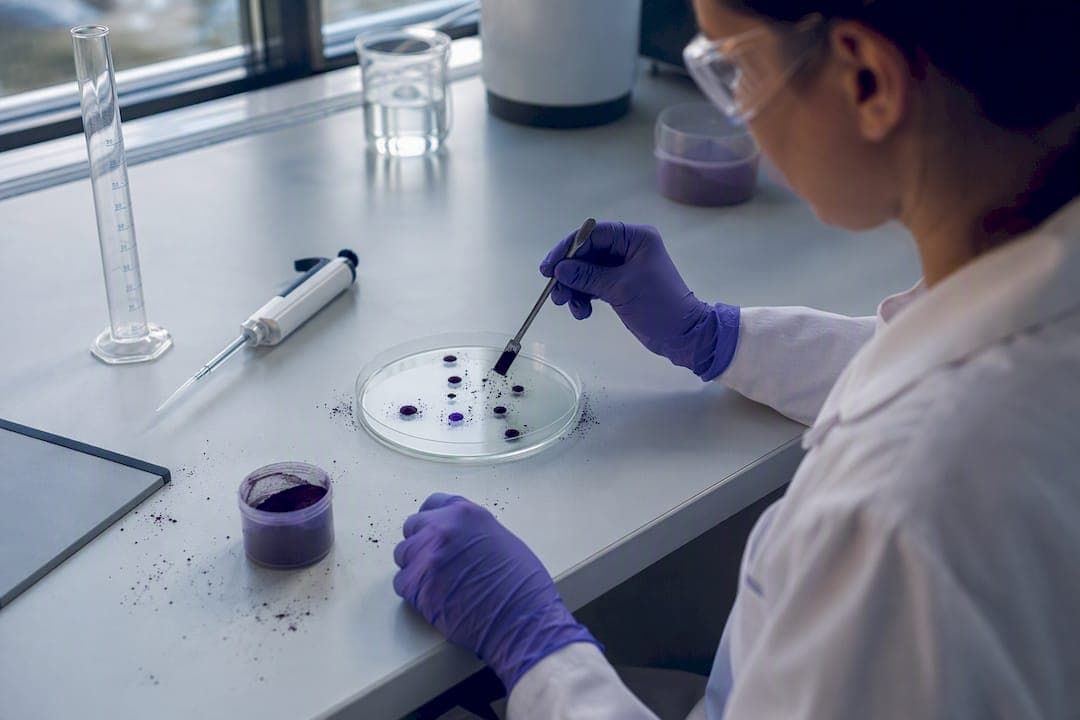
Manufacturers increasingly offer surface-treated pigment grades built for easier wetting, which can cut your dispersant demand meaningfully if your supply chain allows the switch.
Deagglomeration breaks the loosely bound aggregates that survive wetting into primary particles or tight aggregates. Two mechanisms do this work: shear, dominant in high-speed dissolvers, and impact, dominant in bead mills where grinding media collide with particles caught between them. Tip speed and peripheral velocity govern how much energy reaches the particle, and "doughnut flow," the toroidal circulation pattern in a dissolver tank, determines whether material actually passes through the high-shear zone repeatedly or just churns at the edges.
- Wet the pigment fully before applying shear, since dry agglomerates fracture unevenly and waste milling energy.
- Maintain fresh surface exposure during milling. Newly fractured particle surfaces need immediate contact with dispersant, or they reagglomerate.
- Stabilize once particle size is reduced, using steric mechanisms (a solvated polymer tail creating physical separation) or electrostatic mechanisms (charged groups creating repulsive force between particles).
Dispersant anchoring groups, carboxylates, sulfonates, phosphates, or amine and urea functionalities, determine how firmly the molecule grips the pigment surface. The tail chemistry needs to match your solvent or binder system, or the dispersant will desorb during letdown and leave you with re-flocculation weeks after the batch looked fine.
Pro Tip: Test wettability with a simple sink time before committing lab hours to a full ladder study. A pigment that beads on the vehicle surface for more than 30 seconds usually signals a wetting agent gap, not a dispersant dosage problem.
How Do You Choose the Right Dispersant Class for Your Pigment System?
Dispersant selection comes down to three overlapping filters: pigment surface chemistry, solvent polarity, and binder compatibility. Commodity anionic polymers (acrylic or maleic-type) work well on moderate-energy inorganic pigments in aqueous or polar systems and cost less, but they tend to lose grip on high-energy organics and can foam more readily. High-performance comb and graft polymers, often built with ethylene oxide chains, give a better balance between dynamic wetting during active milling and equilibrium stabilization once the mill stops, which reduces sensitivity to letdown shock. Nonionic surfactant-like dispersants suit solvent-based or low-polarity systems where ionic anchoring groups have nothing to grip.
Compatibility rules that save rework later:
- Match the dispersant tail to the binder's solvent or resin polarity, not just to the pigment.
- In multi-pigment systems, one dispersant type often isn't enough. Combining a charge-neutral dispersant with a nonionic co-dispersant frequently improves both wetting and static stability in complex color systems.
- Strip out unrelated surfactants during initial dispersant screening. They can mask a dispersant's true performance or interact antagonistically, giving you a false read on the dosage you actually need.
- Check supplier datasheets for regulatory filters early. APEO-free requirements or solvent-system restrictions can eliminate half your candidate list before you run a single mill trial.
Astra-chemical's own dispersant selection and dosage guide walks through system-specific starting points if you want a shortcut past the general framework above.
How Do You Run a Ladder Study for Dispersant Dosage?
A ladder study finds the dose that fully covers the pigment surface without wasting material or degrading performance, and it's the single most reliable way to avoid guessing your way to a formulation.
- Estimate a starting midpoint dose. Use pigment specific surface area when your supplier provides it; if not, start from the dispersant manufacturer's recommended range.
- Prepare five to seven rungs bracketing that midpoint, typically in even increments spanning roughly half to double the estimate.
- Pre-disperse each rung identically, then mill every rung with the same energy input so dose is the only variable changing.
- Read Hegman fineness, run a rub-out/gloss check, and test letdown shock on each rung.
The dose where fineness plateaus and rub-out shows minimal color difference is your target. Excess dispersant crowds the adsorbed layer and can actually degrade gloss and film properties rather than improve them, so more is not automatically safer. Watch for masked results if leftover surfactants from other additives are still in the test system.
Which Equipment Settings Actually Reproduce Lab Results at Scale?
Dissolvers handle pre-wetting and coarse pre-dispersion; bead mills deliver the fine particle size reduction that determines final gloss and color strength, supported by expert packaging and production services for smooth scale-up and packaging runs. Running both at the correct settings, and understanding why, separates a repeatable process from a lucky batch.
- Target consistent peripheral velocity (tip speed) between lab and plant dissolvers rather than matching absolute RPM, since disk diameter changes the shear profile at a given speed.
- Run bead mills at constant power input rather than constant speed where your equipment allows it. As viscosity and temperature shift mid-run, constant power automatically compensates, which keeps lab and plant runs aligned in ways constant speed cannot.
- Monitor torque continuously. A sudden torque spike usually signals viscosity building faster than expected, often from insufficient wetting upstream.
- Control temperature actively; heat buildup from shear can shift dispersant solubility and destabilize the batch before it ever leaves the mill.
- Match bead size and fill ratio to target particle size, and track bead wear, since worn media loses grinding efficiency gradually rather than failing outright.
Scale-up frequently reduces effective shear rates, so plant runs may need longer dwell time or power matched per unit volume rather than a straight speed transfer from lab equipment.
Pro Tip: If a plant batch consistently underperforms an identical lab formula, check torque logs before touching the formulation. A power input mismatch is a far more common culprit than dispersant dosage.
What Tests Confirm a Pigment Dispersion Is Actually Stable?
Fineness of grind, read with a Hegman gauge, tells you the largest particle size remaining in the paste; most coatings target 6 to 7.5 Hegman units depending on film thickness and gloss requirements. Rub-out testing catches flocculation invisible to the naked eye by comparing color under sheared versus unsheared film application. ISO 1524, ASTM D1210, and ASTM D3333 govern these methods and give you a defensible reference when a customer questions your QC data.
| Test | What it measures | Typical use |
|---|---|---|
| Hegman gauge (fineness of grind) | Largest remaining agglomerate size | Batch release, mill endpoint |
| Rub-out test | Flocculation and shear sensitivity | Detects hidden instability before shipping |
| Heat/storage stability | Viscosity and color drift over time | Shelf-life qualification |
| Color strength/tinting | Pigment efficiency versus standard | Batch-to-batch consistency |
Retain samples from every production batch and log fineness, viscosity, and settling at defined intervals; monthly retesting on active SKUs catches drift before customers do.
Troubleshooting Common Pigment Dispersion Failures
Most dispersion failures trace back to one of a handful of root causes, and matching the symptom correctly saves hours of blind reformulation.
- Flocculation after letdown: usually a dispersant/binder incompatibility or shock from adding solids too fast. Slow the letdown rate and re-evaluate dispersant tail compatibility with the binder.
- Foaming during dispersion: often excess wetting agent or an incompatible defoamer. Reduce the wetting agent dose or switch to a defoamer better matched to the system, such as ASTRA DF NS® for silicone-sensitive formulations.
- Poor gloss or opacity: points to incomplete deagglomeration or dosage below the ladder study optimum. Rerun fineness of grind before assuming it's a resin problem.
- Settling in storage: signals insufficient stabilization or a rheology gap. Check dispersant dosage first, then rheology modifier levels.
Log every deviation with dosage, mill time, and temperature at failure. Escalate to supplier technical service when two consecutive ladder-study rungs give inconsistent Hegman readings; that pattern usually means a variable outside the dispersant is drifting. Controlling letdown temperature and removing interfering surfactants during testing prevents most of these issues from recurring.
Astra R&D Resources for Dosage Studies and Scale-Up Support
ASTRA DISP® dispersants are formulated across the anionic, high-performance comb, and nonionic classes described above, giving formulators a single supplier reference point for initial screening. Astra-chemical's dosage and selection guide provides system-specific starting points that shorten the ladder study window considerably.
Astra R&D also offers:
- Ladder-study consulting to help set up the correct dose range before lab time is spent
- Sample packs sized for bench-scale screening
- Plant-scale consultation for constant-power dispersion transfer
- Troubleshooting support when a formulation that worked in the lab underperforms at production scale
[Case study placeholder: production-scale dosage optimization results to be inserted]
Pro Tip: Request sample packs across two or three ASTRA DISP® grades rather than committing to one upfront. Running a comparative ladder study across grades early catches compatibility issues before they cost you a full development cycle.
Should You Pretreat Pigments Before Dispersion?
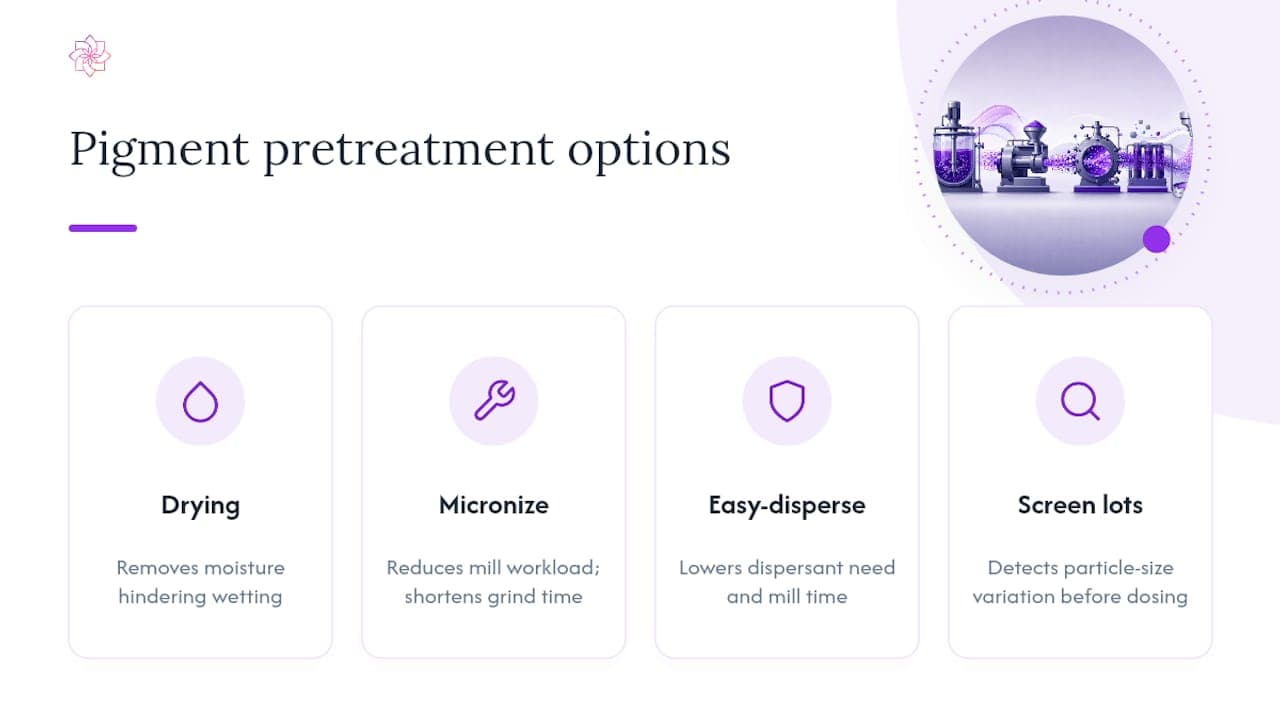
Pretreatment decisions made before a pigment ever reaches the mill often determine how much dispersant and energy the batch will need downstream. Moisture content is the first variable to check. Pigments stored in humid conditions absorb water that interferes with wetting in solvent-based systems, so drying moisture-sensitive grades before weighing can eliminate a wetting problem you'd otherwise chase for hours in the mill.
Pre-milling or micronizing coarse pigment powders before dispersion reduces the workload the bead mill has to do and shortens overall grind time, particularly with organic pigments that arrive from synthesis as large, loosely bound aggregates. This matters most when a plant's mill capacity is the bottleneck; shifting some particle size reduction upstream to a pretreatment step frees mill time for other batches.
Surface-treated "easy-disperse" pigment grades represent a pretreatment done at the manufacturer level rather than in-house. These grades carry a thin coating, often a surfactant or resin layer, applied during pigment manufacture specifically to lower the wetting and dispersant demand a formulator would otherwise face. Switching to an easy-disperse grade can sometimes cut dispersant dosage and mill time enough to justify a modest price premium on the raw pigment, particularly for high-energy pigments like carbon black or certain quinacridone reds that are notoriously difficult to wet using standard grades.
Screen incoming pigment lots for particle size consistency before committing to a fixed ladder-study dose; lot-to-lot variation in raw pigment particle size is a common, underappreciated source of dispersion inconsistency that has nothing to do with your dispersant selection at all.
How Do Solvent and Media Viscosity Affect Dispersion Quality?
Solvent viscosity governs how efficiently energy transfers from the mill to the pigment particle, and getting this wrong is one of the most common reasons a formulation that worked in one solvent system fails in another. A vehicle that's too thin won't generate enough shear stress at the particle surface, no matter how fast the mill runs; a vehicle that's too thick chokes flow through a bead mill and can overload motor torque before it ever finishes the grind.
Bead mills need enough system viscosity to keep beads suspended and moving through the grinding chamber rather than settling or clumping together. Too-low viscosity lets beads settle and creates uneven grinding zones across the chamber; too-high viscosity increases mechanical wear on both beads and mill components while raising the risk of overheating.
Solvent polarity interacts with dispersant tail chemistry in ways that show up as viscosity swings mid-mill. A dispersant tail poorly matched to the solvent can cause the system to thicken unexpectedly as milling progresses, since the polymer isn't staying properly solvated. This is one reason a ladder study run in the intended production solvent gives more reliable dosage numbers than one run in a substitute solvent chosen for lab convenience.
Temperature compounds all of this, since most solvents and resins thin measurably as they heat up during active milling. A batch that starts at target viscosity can drift low by the time milling finishes, changing the effective shear the pigment receives partway through the run and producing inconsistent fineness of grind results between the start and end of a long mill cycle.
How Do Pigment Dispersions Interact With Binders and Other Additives?
A pigment dispersion doesn't exist in isolation. Once it enters letdown, it meets binder resin, rheology modifiers, defoamers, and often a second pigment paste, and any of those can destabilize a dispersion that looked perfect on its own.
Binder polarity is the most common source of post-letdown failure. A dispersant tail solvated well in the mill base but poorly matched to the binder resin will start to desorb once the two combine, and re-flocculation can show up hours or even days after the batch looked stable. This is exactly why compatibility screening against the actual production binder, not a simplified lab substitute, matters more than most formulators initially assume.
Rheology modifiers interact with dispersants in ways that aren't always predictable from datasheets alone. Some thickener chemistries compete with dispersant anchoring groups for the same pigment surface sites, effectively displacing dispersant and triggering flocculation that presents as a viscosity or sag problem rather than an obvious color defect.
Defoamers deserve particular attention, since an aggressive defoamer can strip wetting agents from the pigment surface or destabilize the dispersion's protective layer entirely. Choosing a defoamer chemistry compatible with your dispersant system, rather than optimizing foam control and dispersion stability separately, prevents a fix in one area from creating a failure in the other.
When formulating a multi-pigment system, watch for one pigment's dispersant package interfering with a second pigment's stabilization, particularly when combining organic and inorganic pigments with very different surface chemistries in the same base.
What Analytical Methods Measure Particle Size Beyond the Hegman Scale?
Hegman gauge readings are fast and practical for production floor decisions, but the scale is coarse and somewhat subjective, and it only reports the largest particles in the sample rather than the full distribution. For development work and troubleshooting persistent quality issues, formulation chemists need finer resolution.
Laser diffraction particle size analysis gives a full distribution curve rather than a single cutoff number, showing not just the largest particles but the entire spread from submicron primary particles up through any remaining agglomerates. This matters when two batches read the same Hegman value but perform differently in gloss or color strength, since the underlying distributions can differ meaningfully even at an identical gauge reading.
Dynamic light scattering works well for very fine dispersions, particularly submicron pigments used in high-gloss or specialty coatings, where particle sizes fall below what a Hegman gauge or even standard laser diffraction can resolve reliably.
Microscopy, whether optical or electron, offers direct visual confirmation of particle shape and agglomeration state, which numerical particle size data alone can't fully convey. It's particularly useful when troubleshooting an unusual gloss or color defect where you suspect a specific agglomerate morphology rather than a simple size distribution problem.
These methods cost more in equipment and time than a Hegman gauge, so most production floors reserve them for method development, new pigment qualification, or root-cause investigation rather than routine batch release.
Why the Ladder Study Gets Skipped More Than It Should
The research behind this guide points to one clear judgment: dosage optimization is the step formulators most often shortcut, and it's the one with the biggest downstream cost. Teams under deadline pressure frequently default to a supplier's suggested midpoint dose and move straight to production, treating the ladder study as optional lab polish rather than a required control step.
That's backward. A midpoint dose that works for one pigment lot can fail on the next lot simply because particle size or surface area shifted slightly at the pigment manufacturer. The ladder study isn't really about finding a number; it's about building a dose response curve specific to your actual raw materials, so you can tell the difference between a formulation problem and a raw-material variation problem when something goes wrong six months later.
The conventional advice to "follow the datasheet dosage" undersells how much pigment lot variability exists in practice. Prioritize running the ladder study on every new pigment lot that shows any change in surface area or particle size data, not just on brand-new formulations. That single habit prevents more production failures than almost any other change a formulation team can make.
Sources
- Pigment dispersion I, The basics — American Coatings Association
- PCImag — Introduction to additives: Dispersants
- The Dispersion Process — Arcor Epoxy
FAQ
What Is the Correct Order for Pigment Dispersion Steps?
Wetting comes first, followed by deagglomeration through mechanical shear or impact, then stabilization with an adsorbed dispersant layer. Skipping the order, such as trying to stabilize before deagglomeration is complete, leaves agglomerates in the final batch.
What Hegman Reading Indicates a Properly Dispersed Pigment?
Most coatings target a Hegman gauge reading of 6 to 7.5 units, though the correct target depends on final film thickness and gloss requirements. Confirm the reading with a rub-out test, since Hegman alone won't catch flocculation.
How Many Dose Rungs Should a Ladder Study Include?
Five to seven rungs bracketing an estimated midpoint dose typically gives enough resolution to identify the optimum without excessive lab time. Space the rungs evenly across roughly half to double the starting estimate.
Why Does Excess Dispersant Hurt Performance Instead of Helping It?
Excess dispersant crowds the adsorbed layer on the pigment surface, which can degrade gloss and film properties rather than improving stability. A properly run ladder study identifies the point where fineness and rub-out results plateau, marking the correct dose.
Why Do Lab Formulations Sometimes Fail at Plant Scale?
Scale-up often reduces effective shear rates, so a formula optimized on lab equipment may need longer dwell time or power matched per unit volume rather than a direct speed transfer. Monitoring torque and running bead mills at constant power input helps close that gap.
Recommended
Testing additives for this application?
Send us your current formulation challenge and our technical team will recommend an ASTRA product package for lab screening.